This search engine optimization (SEO) guide explains how to add Schema Markup to a website.
Below, you’ll find a beginner-friendly, step-by-step guide that shows you how to add Schema in websites in three different ways so that you can choose the one that’s right for you.
There’s also a section with additional resources explaining the fundamentals of Schema Markup to help you improve search visibility and traffic for your website and to create the most effective search engine optimization strategy for long-term success.

How to Add Schema Markup to a Website for SEO
1. Add Schema Markup Manually
Step 1: Determine the Best Schema for Your Content
If you read our other guide to schema examples for SEO (the link is at the bottom of this page), you’ll know that you could add many different types of schema markup.
For example, if you’re creating a tutorial, you’ll probably want to use the How To schema, whereas a bio of your company CEO will warrant using the Person schema.
For this tutorial, we will focus on basic article schema as it’s one we imagine most website owners will need to use at some point.
Step 2: Choose a Schema Format
There are three different schema formats you can choose from.
These include:
JSON-LD (JavaScript Object Notation for Linked Data)
JSON-LD is the most popular schema format for SEO and the one we will use in this tutorial. It’s easy to implement and maintain and allows you to add multiple schema types on a single page, all of which are ideal for helping search crawlers understand your site.
Microdata
Like JSON, Microdata is relatively easy to implement. However, it works by using set attributes to define schema properties within your HTML structure, which can make it a challenge to update, particularly for large-scale websites.
RDFa (Resource Description Framework in Attributes)
RDFa gives you greater control over your markup and can be a good choice for enterprise sites or those with complex structures, but it is notoriously challenging to maintain.
Step 3: Identify the Relevant Schema Properties
Before you begin coding and implementing your schema, you need to know which schema properties to use. Schema properties are the specific attributes you assign to parts of your content within the schema.
Using the Article schema, for example, you’d want to give search crawlers details about:
- Your article headline
- The date it was published
- The article author
- The article’s body content
Each one of those would be a property within your schema. We recommend checking out the documentation on Schema.org to get all the properties you need.
Step 4: Code Your Schema
Now that you’ve got all the pieces in place, it’s time to assemble them to create your schema code.
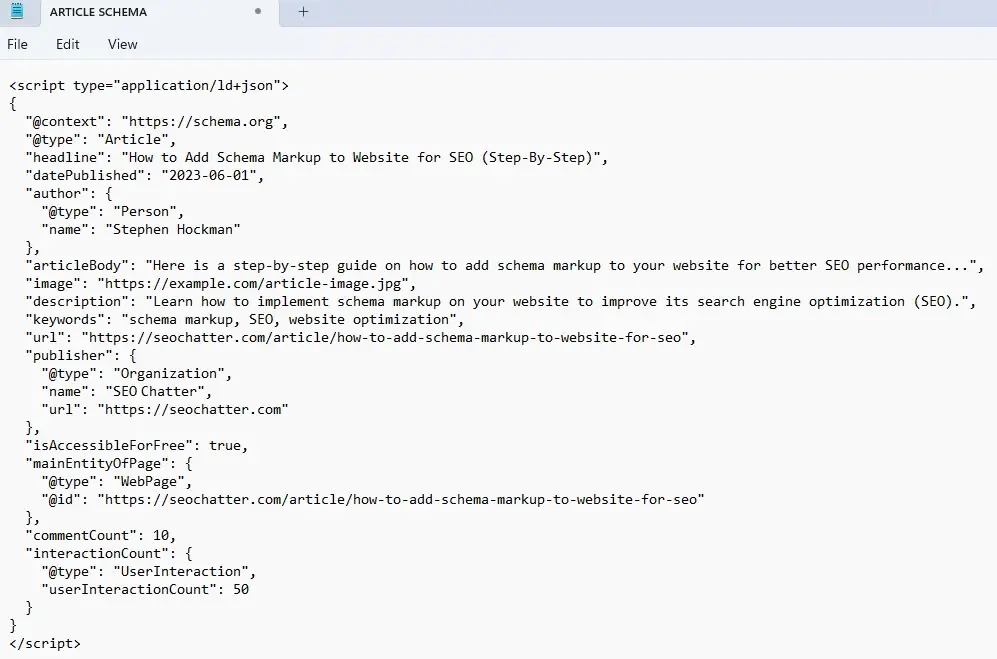
Here, you see a complete article schema written using JSON-LD formatting.
Let’s look at how we put this together.
<script type=”application/ld+json”>
This tells search engines and crawlers that the content within your <script> tags should be interpreted as JSON-LD data.
@Context
This specifies that the schema markup you’re using is the same as defined by Schema.org, which search engines use as a reference to understand the language within your code.
“@type”: “Article”
This specifies that you’re using Article schema. Underneath it, you’ll include those essential details we discussed earlier, like the headline, publication date, and author.
As you’ll see in the image above, here’s where you’ll also add your article description, URL, publisher information, and more.
“isAccessibleForFree”: true,
This tells search engines that your content is freely available. It isn’t hidden behind a paywall.
CommentCount/Interaction Count
This refers to the number of comments and other interactions (such as ratings or ‘likes’) the article has received.
Step 5: Embed the Schema in Your Page
One of the biggest challenges of learning how to add schema markup to your website is knowing where to put it. What makes it such a tricky task is that some types of schema, such as reviews, ratings, and FAQs, are for specific parts of your content and should therefore go within the <body> tags of your page next to the relevant tags.
To add FAQ schema, for example, you would decide where to place it in your HTML code, then add your FAQ data between the two <script> tags you created in the last step.
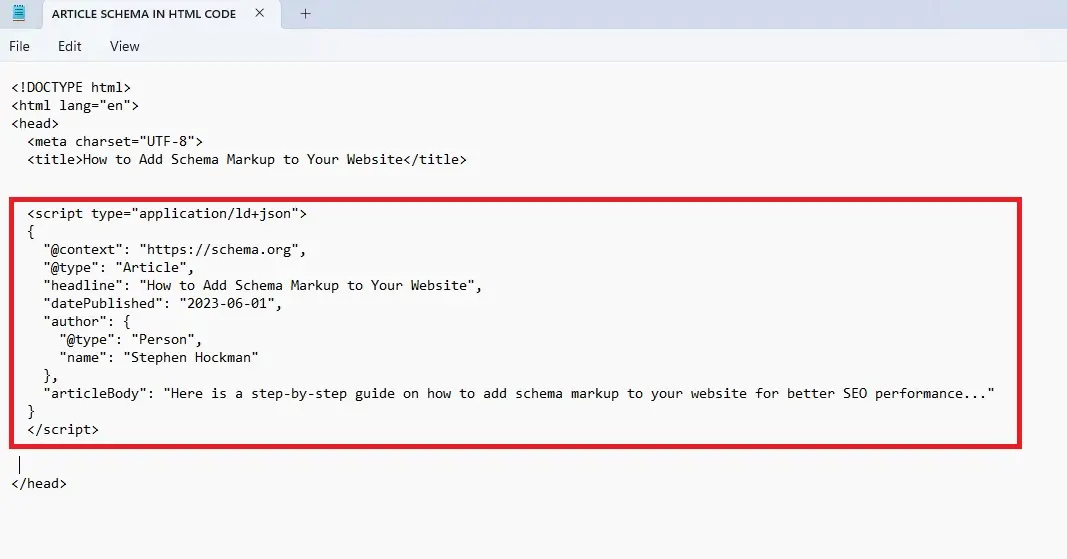
For articles, it’s best to place this information within the <header> tag as above. Once you’ve done all that; be sure to hit save before moving on to the final step.
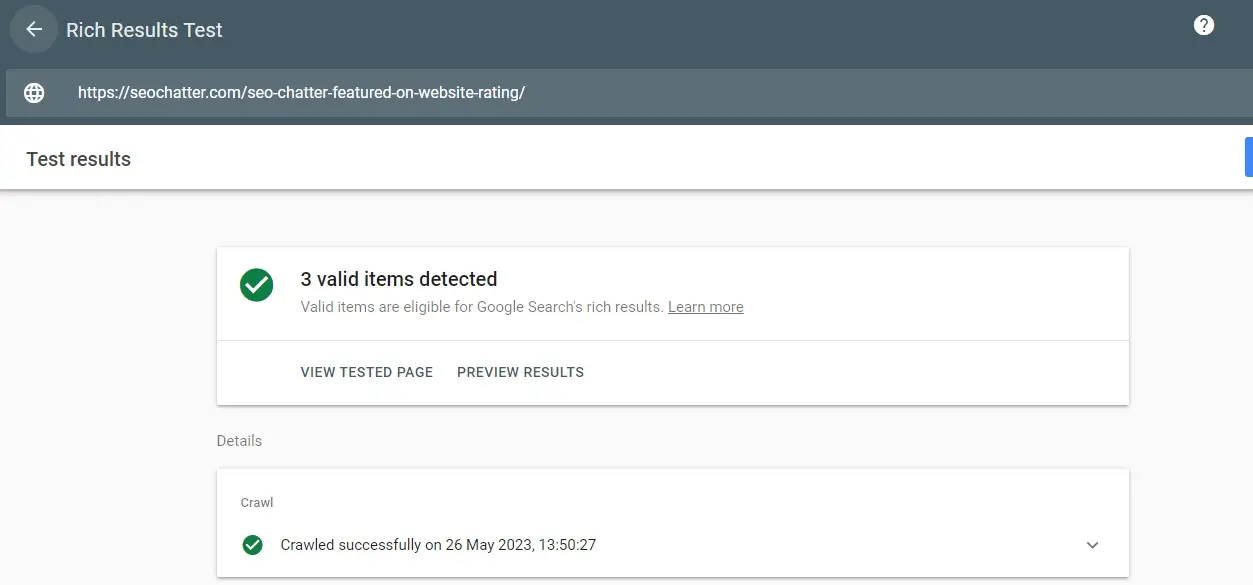
Step 6: Validate Your Markup
Even if you’re 100% sure you did everything right, it’s still worth checking that there are no problems with your newly added schema.
To do that, you can use Google’s free Structured Data Testing Tool and the Rich Results Test Tool to see whether there are any errors or areas for improvement that may be getting in the way of you enjoying all the benefits of schema markup.
2. Add Schema Markup Using a Schema Generator
If all manual coding for Schema Markup seems confusing or time-consuming, you can always automate most of the process by using tools like Merkle’s Schema Markup Generator or some other similar service.
Here’s how it’s done step-by-step:
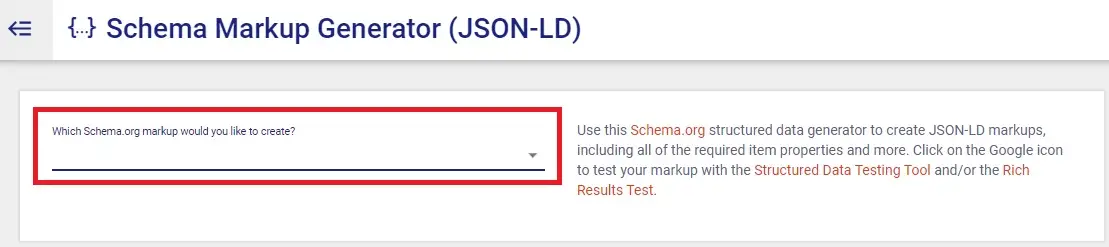
Step 1: Open Your Prefered Generator
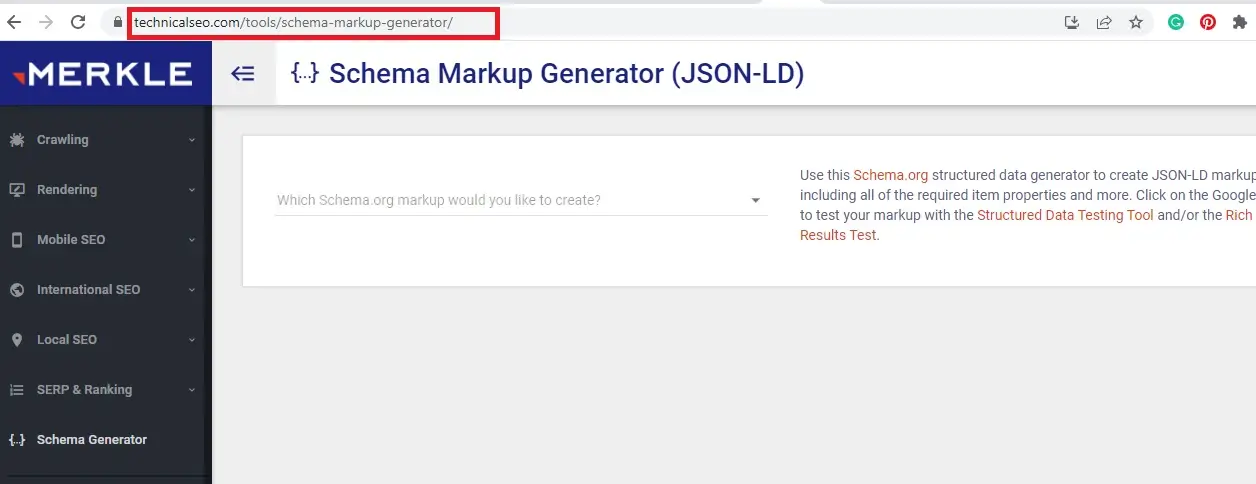
We’ll be using the generator mentioned above for this tutorial, but if you’re not happy with it, you can also try options from RankRanger or the schema markup extension for Chrome from Schema.dev.
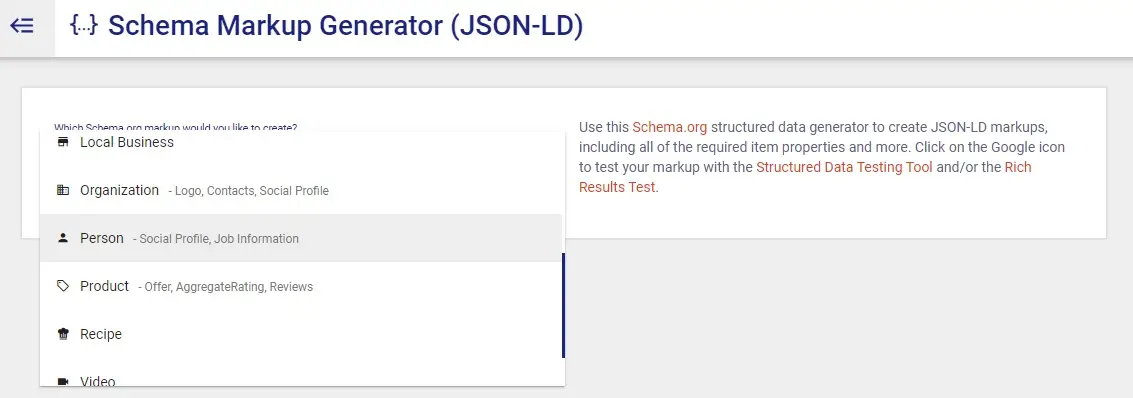
Step 2: Choose Your Schema Type
Next, use the dropdown to select the type of schema you want to create.
To show you how to add different schema types to your site, we’ll use Person schema for this example.
Step 3: Add Values to Your Schema Properties
The generator gives you a simple form to add values to each schema property.
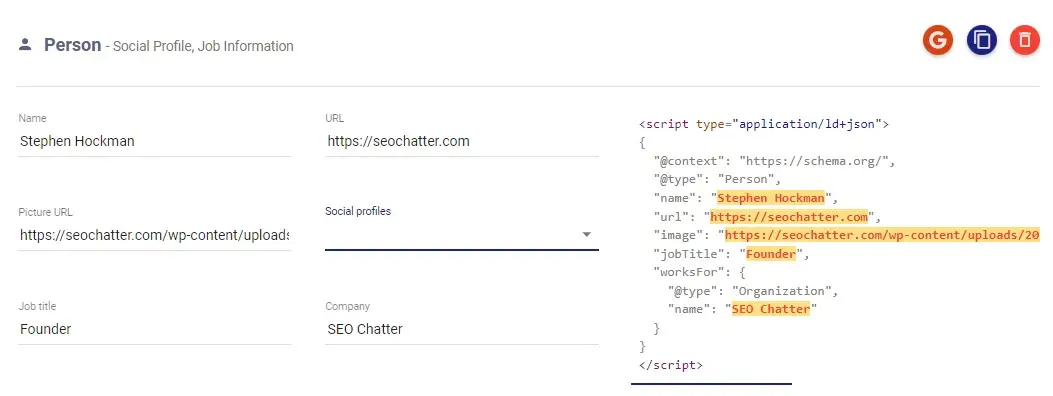
As you complete each part of the form, the schema code is automatically updated to include that property.
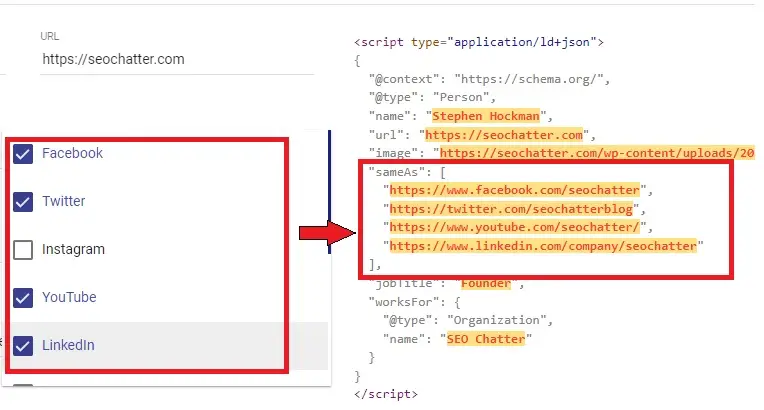
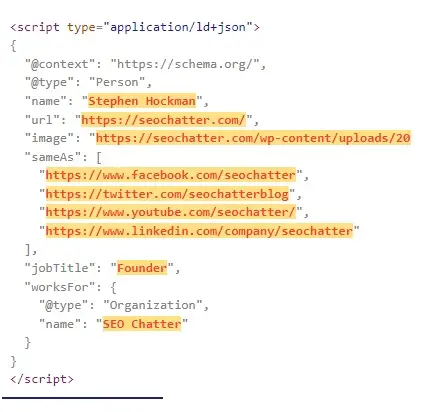
Along with basic details like the person’s name, job title, and URL, you can also use the social profile options to add “SameAs” properties, which link the subject of your schema to their presence on other websites.
Step 4: Add and Validate Your Schema
When you’re done, you should have a fully automated schema markup that looks something like this:
You can then repeat steps 5 and 6 above to add the code to your page and check that it’s error-free.
3. Put Schema Markup In a Website Using a Plugin
If you’re a WordPress user, you can avoid manually adding your schema code altogether by using a plugin.
To show you how it works, we’ll use RankMath (an SEO plugin), though you could always use a similar SEO tool like Yoast or choose a dedicated Schema Markup generator amongst the many available in the WordPress plugin database.

Step 1: Enable Schema (Structured Data)
Once you’ve installed Rankmath, head to the plugin’s dashboard controls and ensure that schema is enabled.
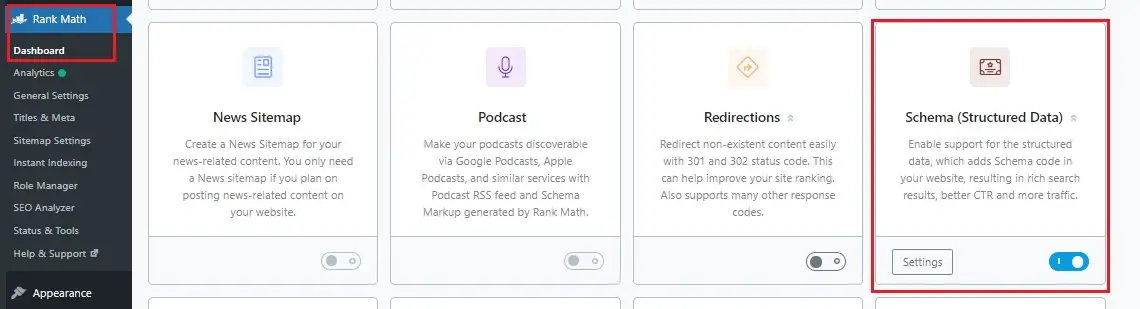
Rankmath features that are enabled have a blue toggle with a white circle at the right, whereas disabled features have a white toggle with a grey process on the right.
Step 2: Select the RankMath Schema Generator
When the Rankmath plugin is activated, it adds a sidebar to your content editor that contains a whole host of tools for optimizing your on-page content, including a schema generator.
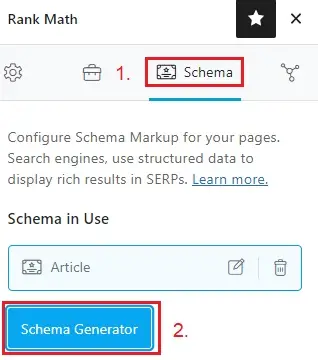
To find it, first, select Schema from the top menu. Your schema is already set to ‘Article’ with all the property values automatically generated from your metadata and other information.
To add more, or create a different schema type altogether, tap Schema Generator.
Step 3: Select Your Schema Type
Clicking the generator button brings you a full menu of all the schema types RankMath supports.
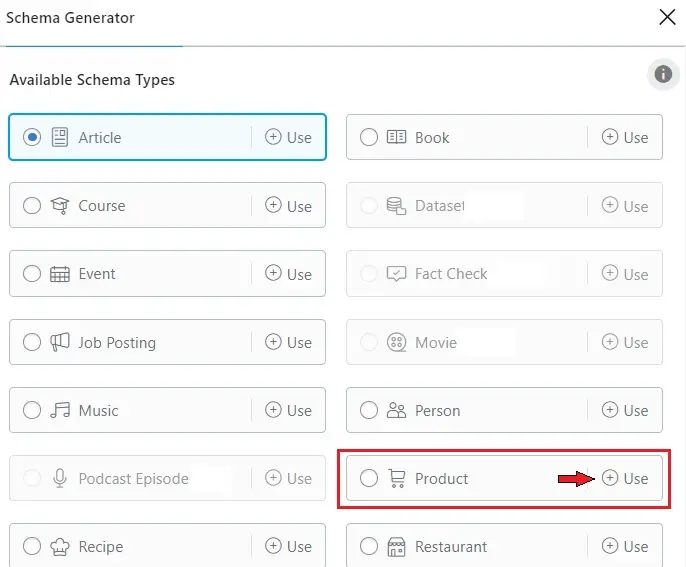
Click +Use next to your required to select it.
Step 4: Build Your Schema
Finally, use the Schema Builder to add in all the details for your schema.
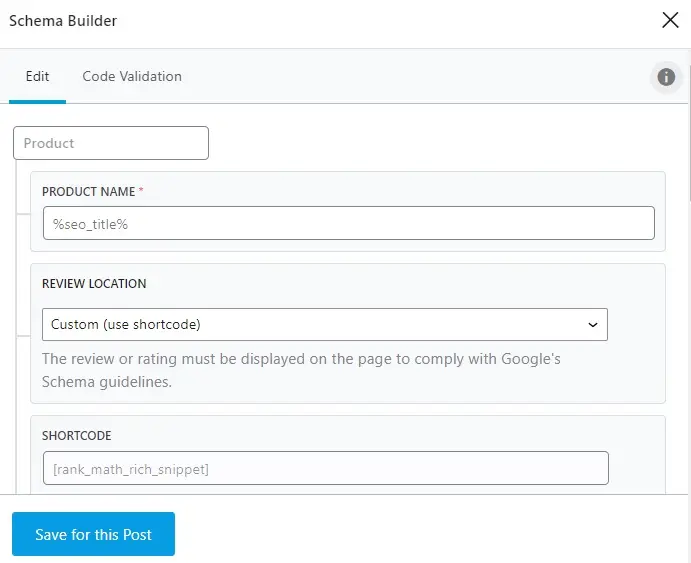
You can also use the in-built Code Validation tool to check for errors.
With that done, click Save this Post and you’ll have the Schema Markup added to the website automatically from the plugin.
Add Schema Markup to Website for SEO Summary
We hope you enjoyed this guide explaining how to add Schema Markup to a website for SEO.
As you discovered, the process for how to put Schema in a website includes adding the markup manually, using a Schema generator, or adding the code with a plugin. Regardless of the method you choose to add Schema to your website, the same output occurs: a well-optimized page using Schema Markup to help search engines better understand the meaning and relationships behind certain entities on the web page.

SEO Chatter is dedicated to teaching the fundamentals of search engine marketing to help marketers understand how to increase organic website traffic and improve search engine rankings.