This guide explains Ezoic Humix.
Below, you’ll find out what is Humix and how it works to host videos for online publishers. You’ll also discover the various ways you can customize the Ezoic Humix settings, the methods available for publishing videos on the Humix network, the different ways you can earn money with this video hosting platform, and how Humix compares to YouTube.
By the end of this page, you’ll understand the purpose and capabilities of Humix and how it can be a strong asset for your digital marketing strategy.
Disclosure: This is a sponsored post by Ezoic. All reviews and opinions expressed in this post are based on my personal views and use of the Humix platform.
What Is Humix?
Ezoic Humix is an end-to-end video management platform for video hosting, video sharing, and embedding network videos on a website. Humix gives publishers direct control over how they display, share, and monetize video content on the web.
How Does Humix Work?
Humix works by allowing publishers to upload videos to the Humix platform, configure each video’s settings, choose where those videos are displayed, measure user performance, and track revenue to make better digital marketing decisions.
There are three main ways Humix can work for you as an online publisher:
- Embed videos you own on your website to enhance the written content and earn revenue from video ads. Videos are also indexed in search engines to drive more organic traffic to your website.
- Share your videos on the Humix network for other publishers to display on their sites to improve their content while splitting the ad revenue.
- Display videos from other Humix users on your website and split the ad revenue with those creators.
You can choose one or all of the above options to maximize the audience reach and earnings for individual video content. Additional details about Humix Monetization methods and revenue share percentages chart can be found at the bottom of this guide.
Now, there are five key areas of the Ezoic Humix platform that you can use to view and customize video settings (Overview, Studio, Site, Monetization, and Channel) which are explained next. You can also try Humix at any time by visiting the Ezoic Humix Network page.
Humix Overview
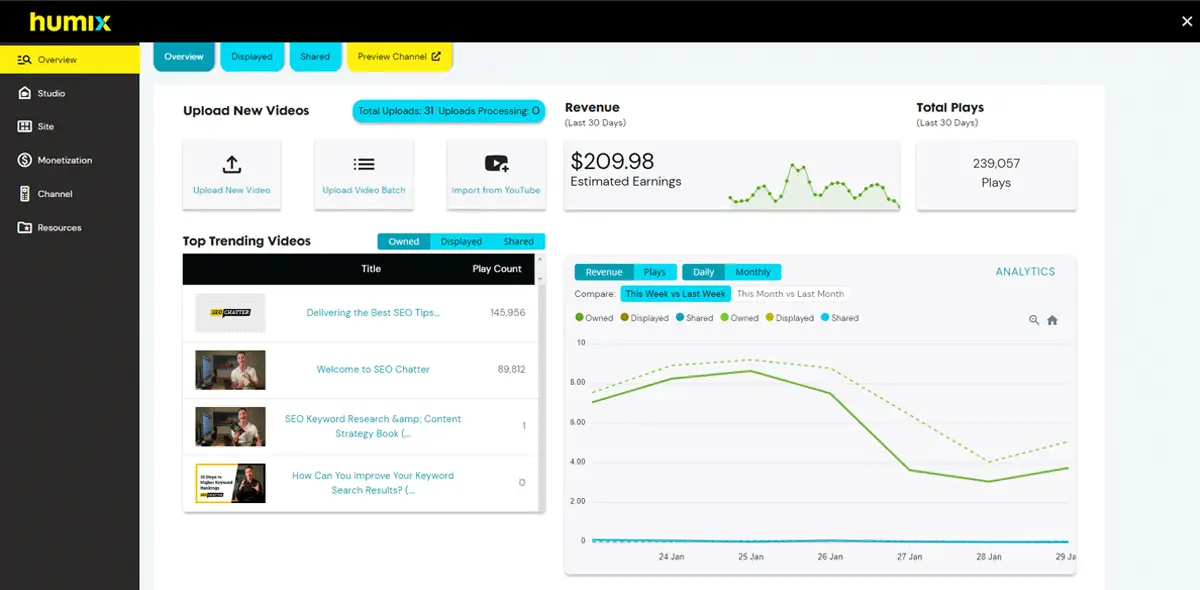
When you navigate to the main Humix dashboard, you’re presented with the Overview screen which displays general information about your videos and quick access to important features.
At the top of the Overview screen, you’ll see four tabs:
- Overview: This is the default page with general information about your Humix account.
- Displayed: This shows a list of videos from other Humix users that have recently been displayed on your website.
- Shared: This shows a list of your shared videos that have been inserted on other publishers’ sites.
- Preview Channel: This opens a new browser tab that takes you to your Humix channel which is a subdirectory on your website (e.g., domain.com/humix/). Here, you can see playlists you’ve created, the most viewed videos, the most liked videos, and more.
In the main area of the Humix Overview dashboard, you’ll see multiple sections:
Upload New Videos
This section shows you the total number of videos you’ve added to your Humix account and includes three buttons to upload new videos:
- Upload a single video.
- Upload a batch of videos.
- Import videos from your YouTube channel.
Revenue
This section gives you a 30-day overview of your estimated Humix earnings for both owned and shared videos.
Total Plays
This section reports the total plays for all of your videos over the last 30 days.
Top Trending Videos
This section shows you which of your videos have the most play counts and can be filtered in three ways:
- Owned (all of your videos)
- Displayed (videos shown on your site from other Humix users)
- Shared (your videos being displayed on other sites)
Analytics
This graph lets you toggle between revenue and play counts as well as daily and monthly metrics. You can also compare the current week’s (or month’s) performance to the previous week (or month). Clicking the ANALYTICS will open the Humix report in Ezoic Analytics in a new browser tab for deeper analysis.
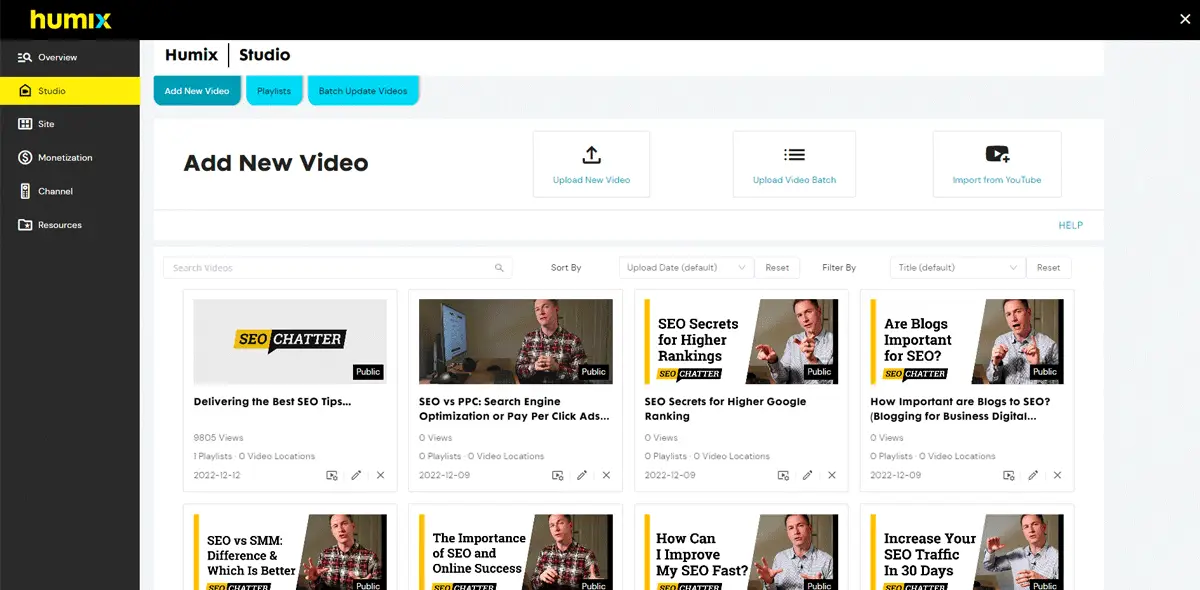
Humix Studio
The Humix Studio is where you add, edit, and delete videos; create playlists; and batch update multiple videos at once. Below are explanations for how each tab works.
Add New Video
This screen includes the same video upload options that appear on the Humix Overview page. You can upload videos one at a time, in a batch, or import them from YouTube. If you have a YouTube channel with existing videos, the importing option is nice because it automatically imports your videos, titles, and descriptions so you don’t have to perform those manual processes again. This screen also allows you to search for videos by keyword and sort and filter the results.
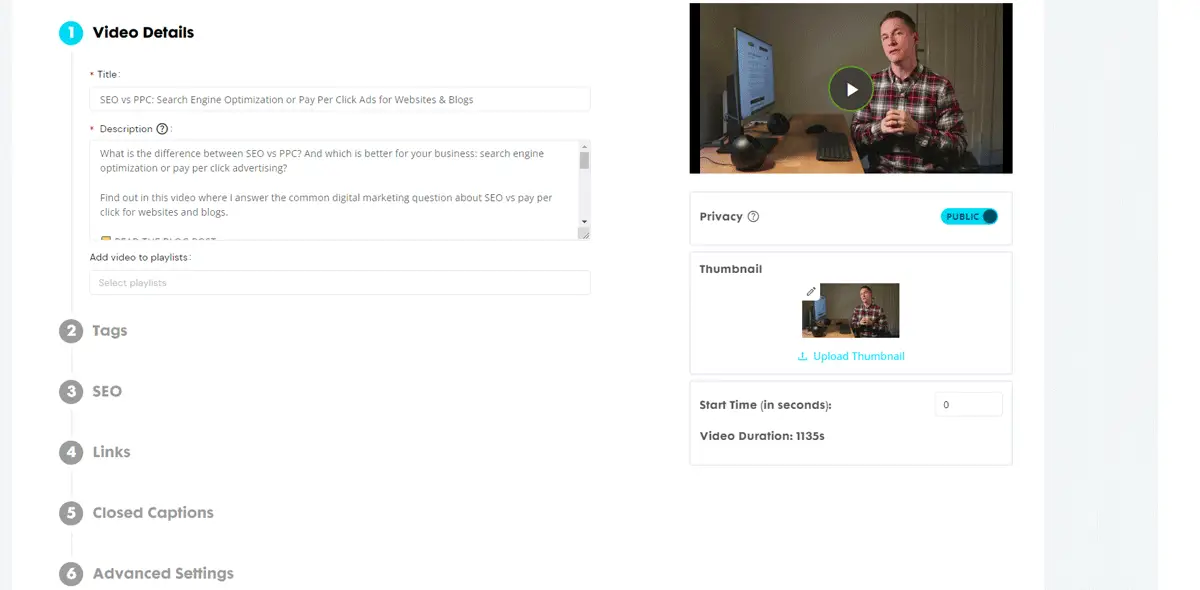
From the Add New Video screen, you can also click on the pencil icon to edit the details of any video, including:
- Title
- Description
- Playlist it is associated with
- Tags
- SEO keywords
- Links that appear during playback
- Closed captions (auto-generated captions are available)
- Advanced settings (like iframe restrictions)
- Turn public or private viewing on or off
- Change video thumbnail
- Adjust the start time if needed
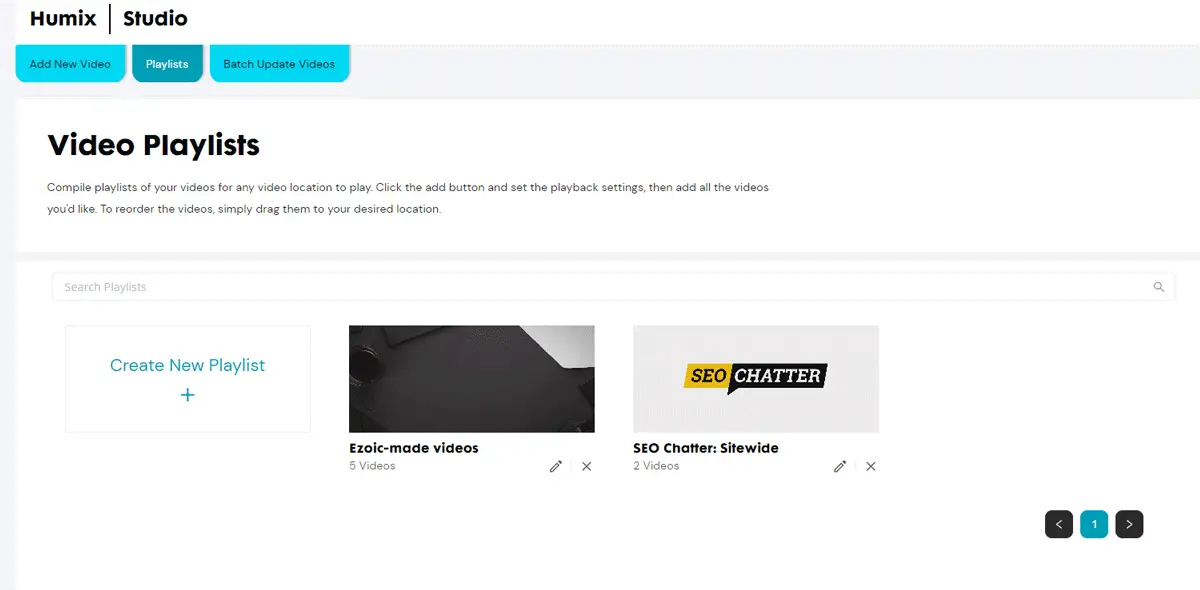
Playlists
This allows you to create playlists for your videos that can be embedded on your website as well as adjust the playback functionality between loop, shuffle, and autoskip.
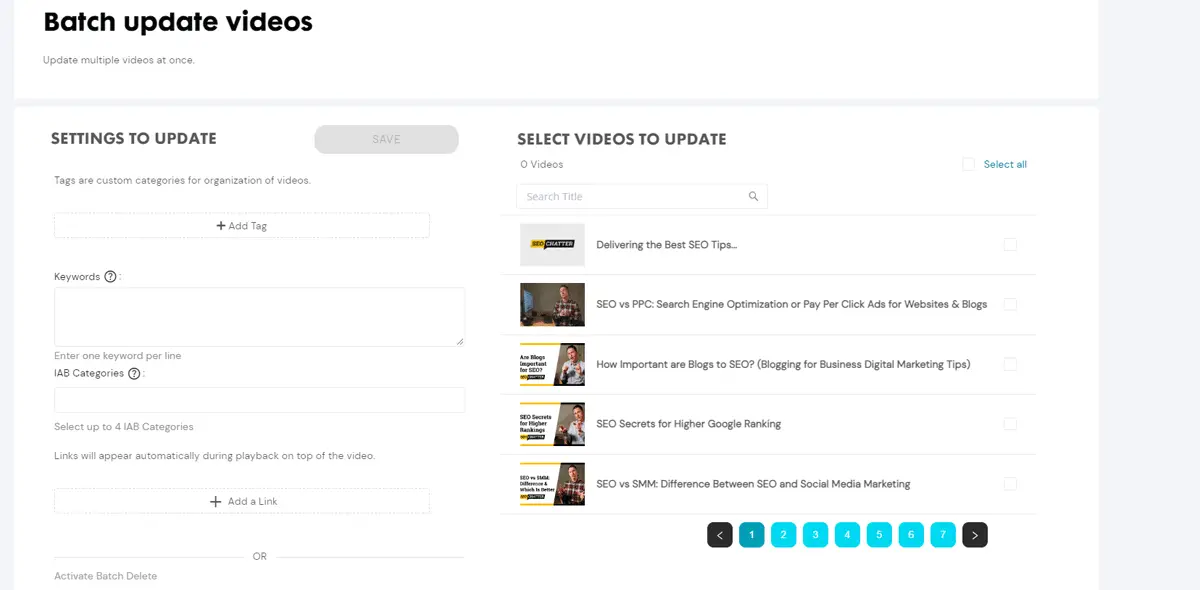
Batch Update Videos
This feature lets you update multiple videos at once adding tags, keywords, IAB categories, links, etc, in one click.
Humix Site Settings
The Humix Site Settings section is where you control the locations and sharing settings for your videos as well as a number of other important features that impact how videos appear across your website and the Humix network.
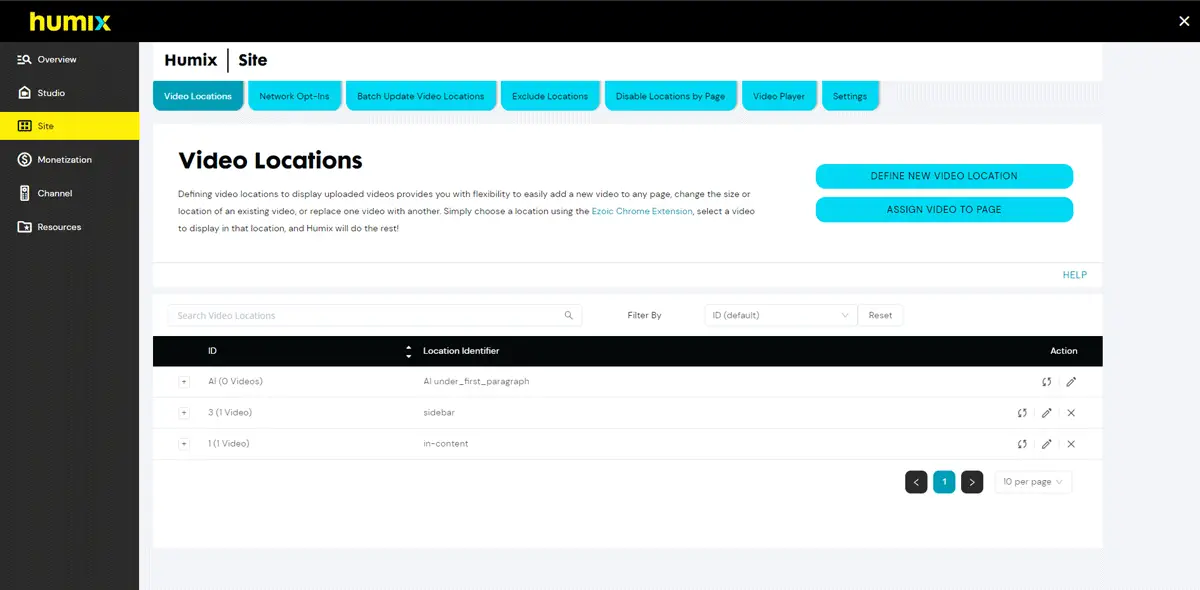
Video Locations
This setting lets you define locations for individual videos and playlists and assign videos to specific web pages. It also allows you to set the width and height parameters so the videos fit nicely in your website’s theme.
If you’re using the Ezoic Chrome Extension for placeholder management, you can also create a video placeholder and then use Humix to populate the placeholder with a video or playlist.
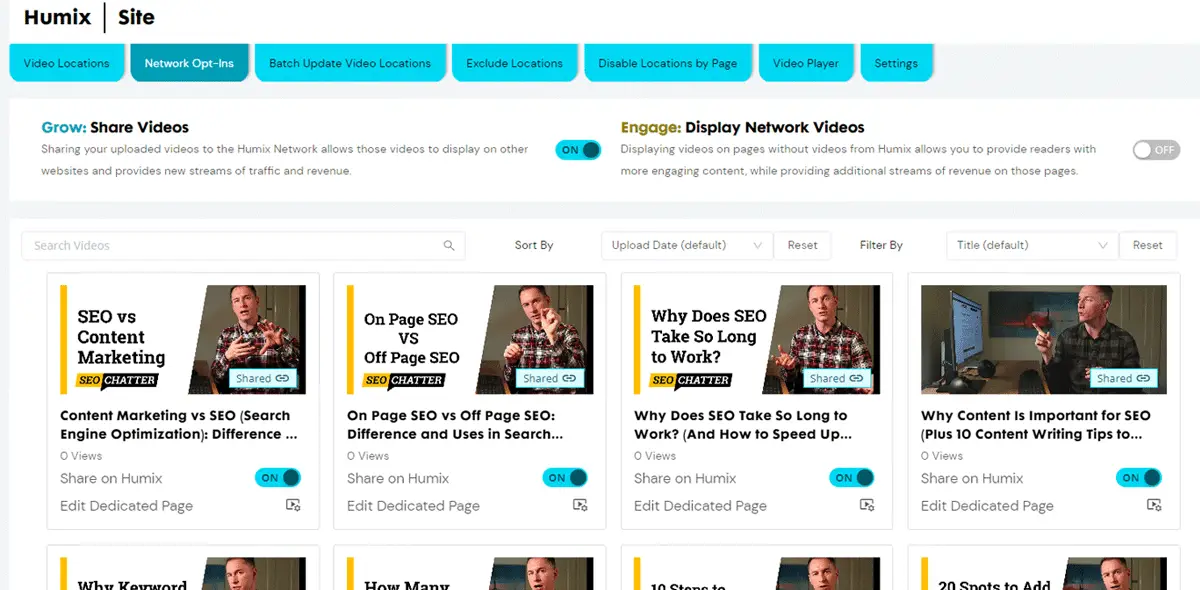
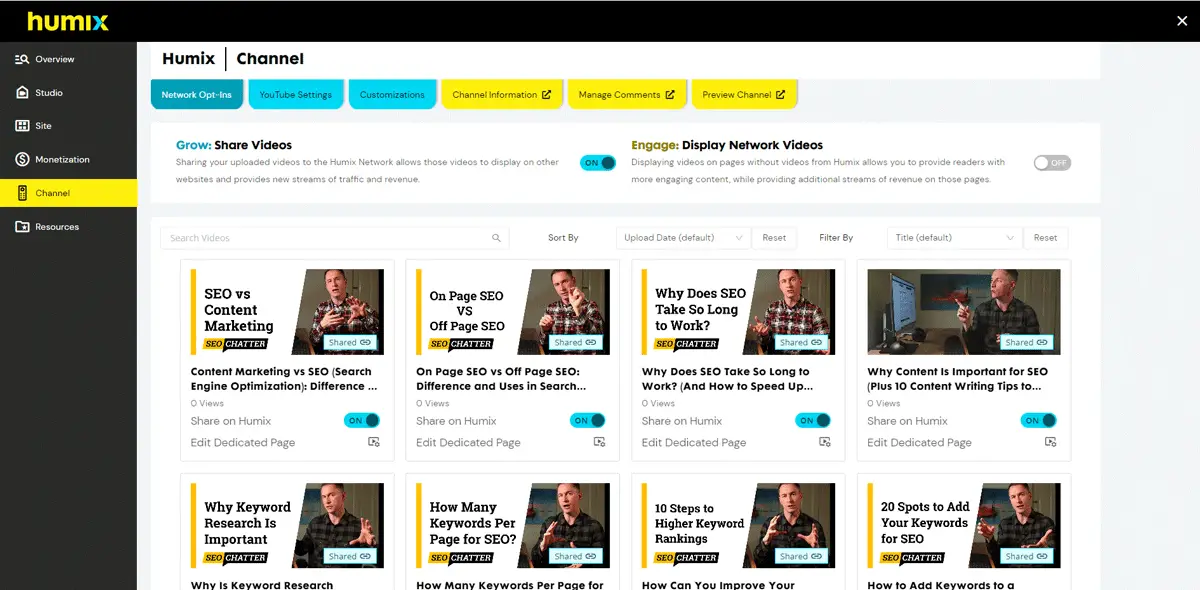
Network Opt-Ins
This section is where you’ll choose the sharing and display options for videos that are on the Humix network.
Turning on the Grow setting enables you to share your uploaded videos so they are eligible to be displayed on other Humix users’ websites to earn additional ad revenue. Additionally, you can edit the sharing settings for each video individually by toggling the on/off button next to Share On Humix.
Turning on the Engage setting enables your website to display videos from other Humix users on your web pages to earn additional ad revenue. Videos are matched to content by keywords found in the video titles, descriptions, and SEO fields.
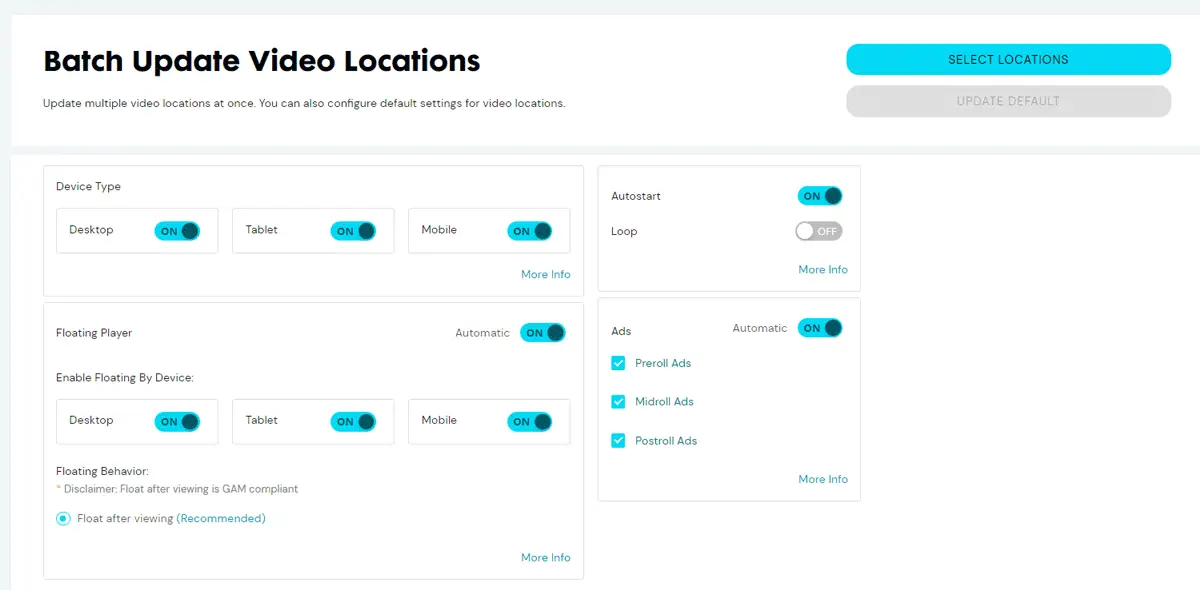
Batch Update Video Locations
This setting’s page allows you to update multiple video locations at the same time. You can also configure default settings for video locations. First, you need to click on the “Select Locations” button to choose a video location, then adjust the various parameters you want to be applied to that location.
For example, you may want to turn on or off the Autostart function or a specific type of ad, such as preroll, midroll, or postroll ads. The Batch Update Video Locations settings let you make these types of adjustments to many videos at once without having to manually adjust the parameters on each video.
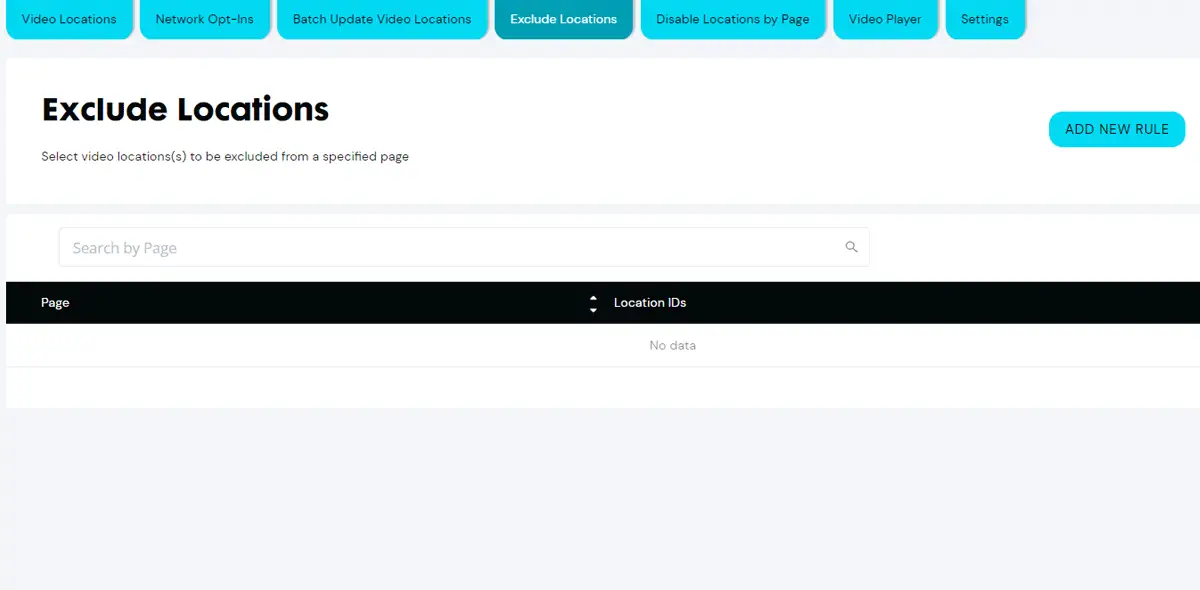
Exclude Locations
This setting enables to set up rules that exclude video locations on specific web pages. For example, you may have an in-content location that shows a video sitewide but you don’t want that video appearing on a landing page. This setting is what allows you to exclude that landing page from displaying the video on the page.
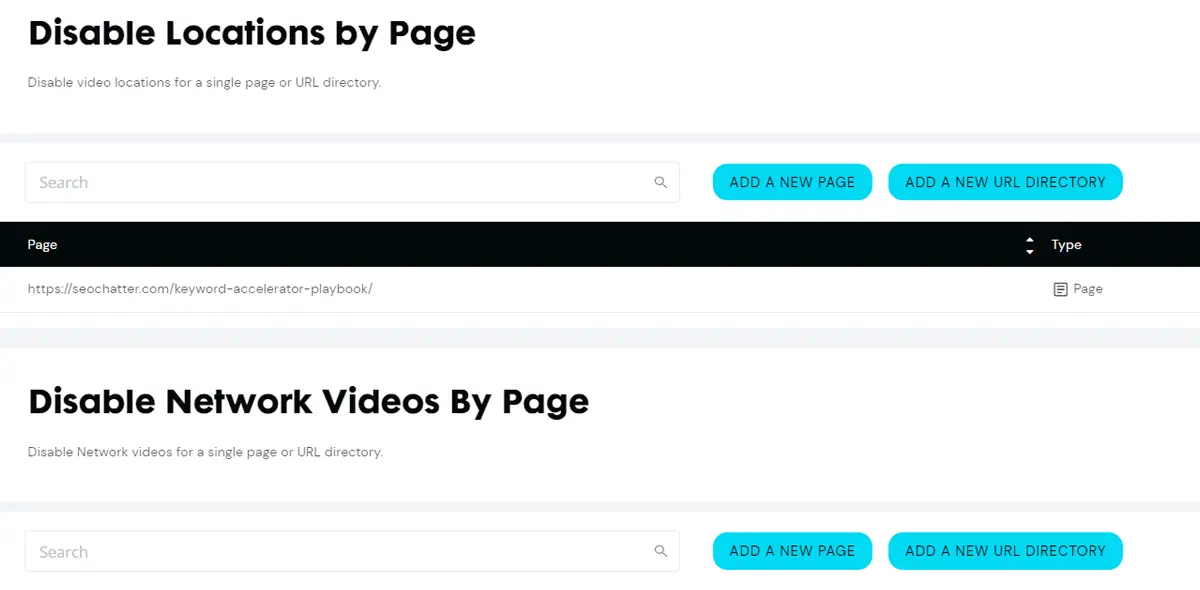
Disable Locations By Page
If you want more options for disabling video locations on your website, this setting gives you that flexibility. Here, you can disable third-party videos from Humix network from being displayed on specific web pages as well as by MetaTab and Cookies.
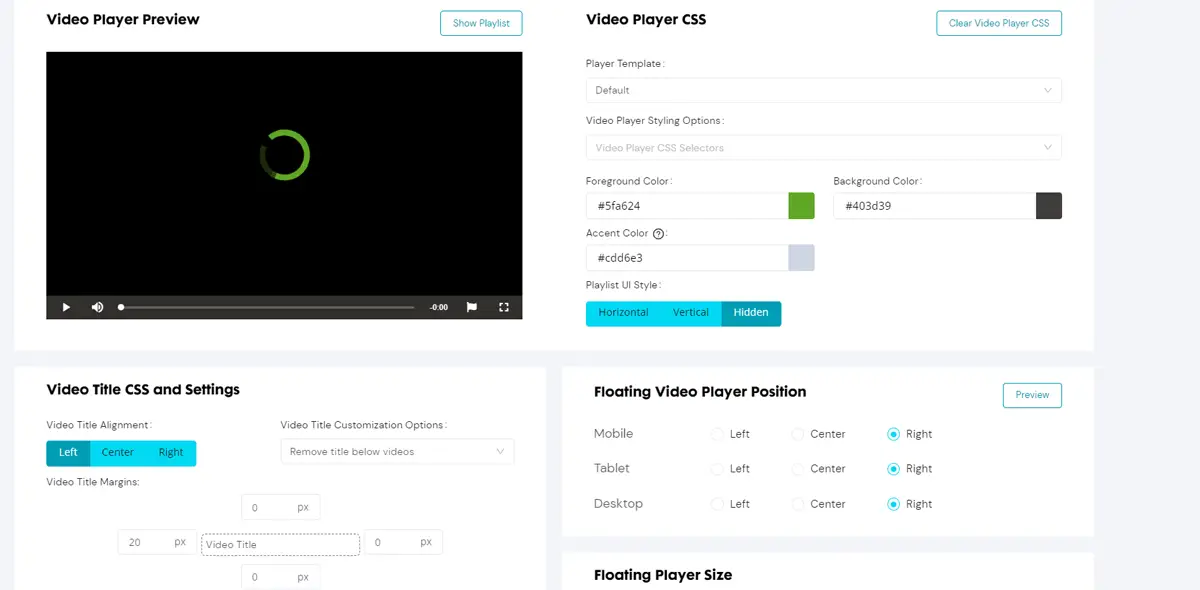
Video Player
Humix gives you full control over the appearance and positioning of the video player that’s used to embed videos on your website. In the video player settings, you can adjust the following elements:
- Video title alignment: left, center, or right.
- Custom video title appearance: remove it entirely, add a prefix or suffix, or create a custom title for all videos.
- Adjust the video player margins.
- Change the colors of the video player with CSS.
- Change the playlist style to horizontal, vertical, or hidden.
- Change the floating position and player size independently for mobile, tablet, and desktop devices.
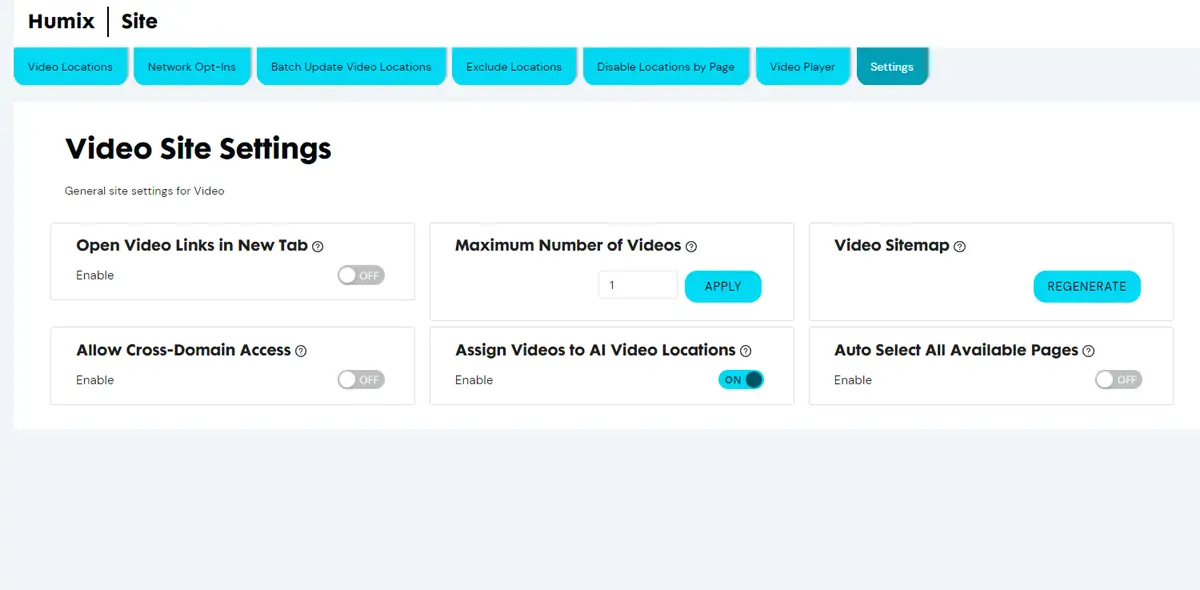
Settings
This is the general site settings for videos, including:
- Open video links in a new tab: on or off.
- The maximum number of videos allow on each web page.
- Video sitemap regeneration button.
- Allow cross-domain access to display videos from other Humix libraries you own (i.e., other websites on Ezoic).
- Assign videos to AI locations: on or off.
- Auto-select all available pages: on or off.
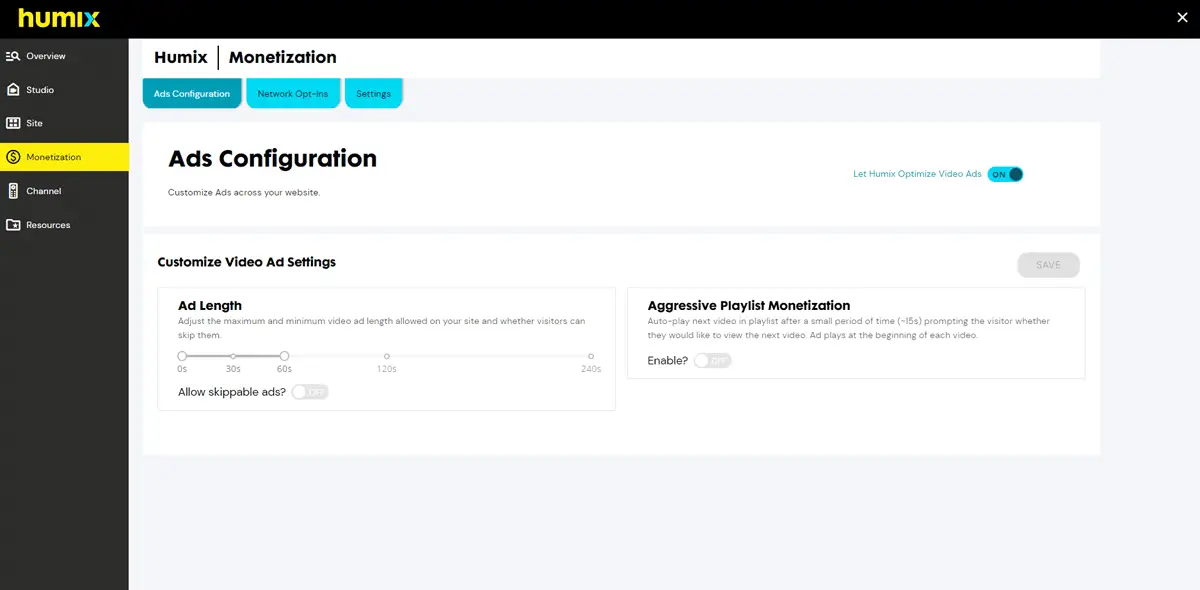
Humix Monetization Settings
The Humix Monetization settings is where you can configure ad settings across your website. You can toggle the ON setting for “Let Humix Optimize Video Ads” to get the best configuration settings or turn it OFF to gain access to the customized ad settings mentioned below.
Ads Configuration
- Ad Length: This setting lets you adjust the maximum and minimum video ad length allowed on your site.
- Allow Skippable Ads: This option can be turned on or off to allow users to be able to skip ads or not.
- Aggressive Playlist Monetization: This setting auto-plays the next video in a playlist after a short period of time (e.g., 15 seconds) to display more ads to the user to generate more revenue regardless of video length.
Network Opt-Ins
These are the same settings that appear under the Humix Site Settings Network Opt-Ins tab.
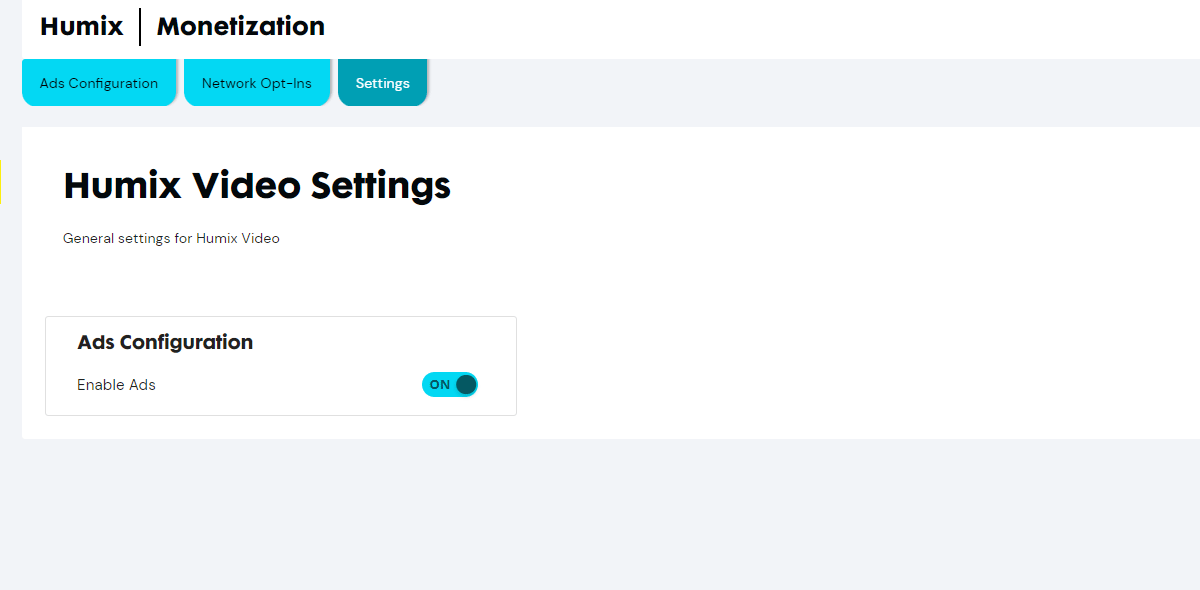
Settings
This screen is where you can enable or disable ads across your website by toggling the on and off button.
Humix Channel Customizations
The Humix Channel dashboard allows you to manage and customize certain elements of your channel from one convenient location.
Network Opt-Ins
These are the same settings that appear under the Humix Site Settings Network Opt-Ins tab.
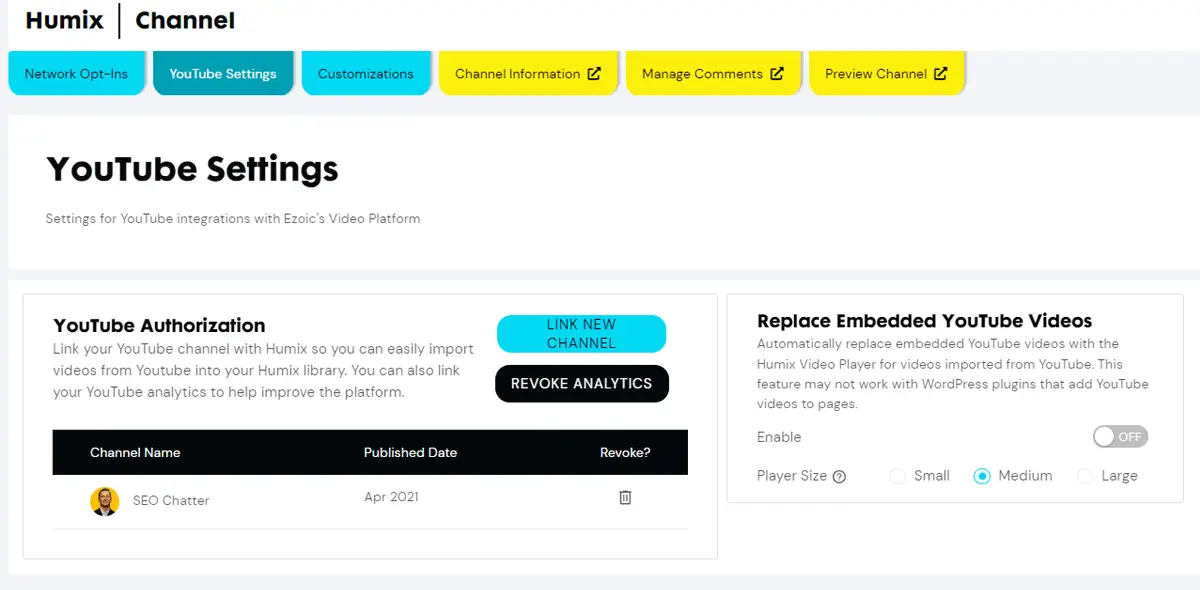
YouTube Settings
These settings apply to YouTube integrations with Humix. If you have a YouTue Channel, you can link it to your Humix account to automatically import videos from your YouTube uploads. You can also link your YouTube Analytics to help improve the Humix platform.
Another good feature here is the ability to automatically replaced embedded YouTube videos on your website. Enabling this setting will replace the YouTube videos with the Humix video player during the import process so you don’t have to manually switch them out.
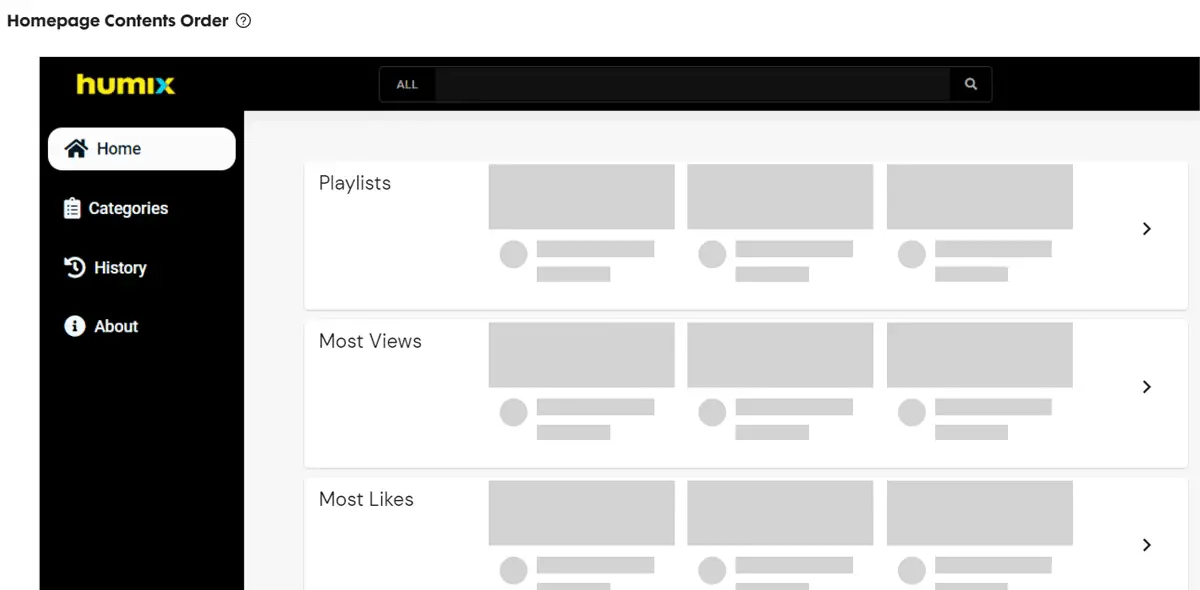
Customizations
This screen allows you to reorder the sections of your Humix Channel by using the drag-and-drop function. For example, you can click and drag the Most Views section to the top of the page so that section is viewed first on your Humix Channel.
Channel Information
Clicking on this tab opens a new browser window that allows you to change the logo, description, and screenshot for your website.
Manage Comments
Clicking on this tab allows you to manage comments that have been made on your Humix videos.
Preview Channel
Clicking on this tab lets you preview your Humix Channel in a new browser window.
Humix Resources
The Humix Resources section includes links to documentation that can help you get started with the Humix platform as well as send feedback to Ezoic to help improve the Humix experience.
Earning Money With Humix
As mentioned earlier in this guide, Humix allows you to monetize your videos and earn revenue from other users’ videos in a variety of ways as outlined in this chart.
| Humix Monetization Method | Revenue Share |
|---|---|
| Videos you upload and own are embedded on your website. | 100% ad revenue goes to you. |
| Your videos are shared on the Humix network for other sites to use. | 50% ad revenue split with the other publishers. |
| Videos created by other Humix users are displayed on your website. | 50% ad revenue split with the other publishers. |
You can check out my complete Ezoic Humix review with real video revenue test results to find out how several of the monetization features work.
Humix vs YouTube
You may be wondering what the difference is between Humix and YouTub and why you should consider using Humix over YouTube for hosting your videos and earning ad revenue.
The main differences between YouTube and Humix include:
- Humix doesn’t have strict eligibility requirements like YouTube. Anyone can upload videos to Humix and start earning money right away. YouTube requires at least 1,000 subscribers and 4,000 watch hours before monetization features are available.
- Humix videos can earn revenue instantly. With YouTube’s monetization requirements, Google keeps all of the revenue generated by your videos until you meet the eligibility requirements to turn on monetization.
- Users of Humix don’t have to upload their own videos to take advantage of the monetization features. By enabling the Engage feature, you can display other Humix users’ videos on your site and earn a 50% split of the ad revenue.
- Humix offers instant reach for uploaded videos by showing shared videos on other Humix users’ websites. There’s no need to wait for a ranking algorithm like YouTube’s to determine the potential reach your videos may or may not get on the platform.
- Humix is easily integrated with Ezoic Flickify, an online tool that turns written content into videos. Flickify gives users the ability to create professional videos using text-to-speech technology and visual animations. YouTube doesn’t have this type of feature to help its users create videos.
Overall, Humix offers video producers a lot more advantages than YouTube. However, a good video marketing strategy would be to use both platforms to earn money from your video content as I’ll explain next.
My recommendation is that you use Humix as your primary video hosting platform and YouTube as a secondary channel to earn additional revenue when you can (it’s a free ad revenue source so why not?).
Therefore, you should go to the Ezoic Humix Network page and get started with a new account. Next, use Humix to embed videos on your site (not YouTube) because you’ll instantly start earning ad revenue without any restrictions.
Then, you should turn on the Humix Grow feature to share your videos across the network. Optionally, you can participate in the Humix Engage function to allow other network users’ videos to play on your website to earn even more money.
After your Humix setup is complete, you can then host the same video content on YouTube as an extra way to pick up some more monthly ad revenue. However, you’ll need to wait until your YouTube channel meets the monetization requirements for those earnings to kick in.
Ezoic Humix Summary
I hope you enjoyed this guide on Ezoic Humix.
As you discovered, Ezoic Humix is an end-to-end video management platform for video hosting, video sharing, and embedding network videos on a website. Humix gives publishers direct control over how they display, share, and monetize video content on the web using a variety of configurations and settings through an easy-to-use dashboard.

SEO Chatter is dedicated to teaching the fundamentals of search engine marketing to help marketers understand how to increase organic website traffic and improve search engine rankings.